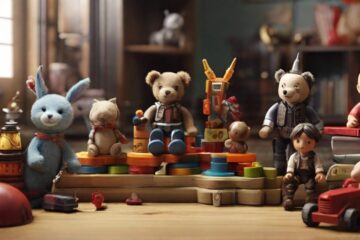
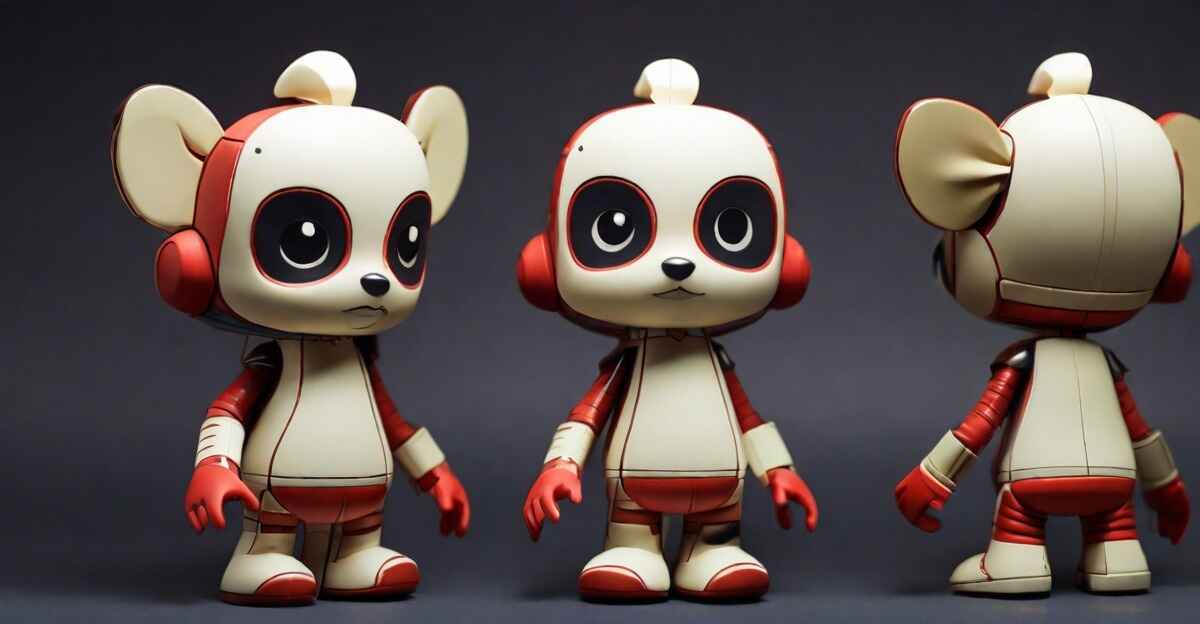
Welcome to the vibrant world of vinyl toys! Here art and collectibles seamlessly collide! Collectors often refer to vinyl toys as designer toys or art toys. The popularity of vinyl toys has grown since the early 1990s. Squishy, adorable vinyl toys are capturing hearts everywhere. A variety of cartoon characters and edgy and avant-garde creations are featured in vinyl toys. But how to make a Vinyl toy? A detailed description of the entire process of creating vinyl toys can be found in this article. By addressing some common questions, we hope to help you understand vinyl toys.
History of Vinyl Toy
We haven’t seen vinyl toys in a while. Street art, urban culture, and a desire for something special go into vinyl toys!
Origins in Street Art (Late 20th Century):
During the late 20th century, vinyl was first used by artists and illustrators. It was started by Michael Lau and James Jarvis.
Toy Movement (late 1990s – early 2000s):
The art toy industry took off in the 1990s. In collaboration with toy companies, art and toys blurred. Accessibility and collectability were the goals.
Urban Vinyl Explosion (Mid-2000s):
In the mid-2000s, urban vinyl was in vogue. Our thanks go out to Kidsrobot, Toy2R, and Medicom Toy. Among vinyl figures, Kidrobot dominated the market.
Diversity of Designs and Styles:
Graffiti, graphic design, and illustration artists all used vinyl toys as canvas. Vinyl toys are unique and customizable because of their diversity of styles and designs.
Global Impact and Collectability:
Vinyl toys made limited-edition toys more popular. This collectible toy market is booming.
Evolution of DIY (Do It Yourself) Vinyl Toys:
Vinyl toys became a huge trend, where artists and enthusiasts could customize blank figures. The vinyl toy culture was given a personal touch, fostering a sense of community.
Influence on Popular Culture:
A wide variety of media have featured vinyl toys, including galleries, fashion, and mainstream media. It’s not just collectibles anymore, vinyl toys are cultural icons.
Essential Tools for Vinyl Toy Making:
Design and Sculpting:
- Pencil & Paper
- Sculpting Medium (clay, foam, wood, 3D printer)
- Craft Knives
- Toothpicks & Skewers
- Smoothing Tools (spatulas, rubber brushes)
- Rolling Pins (optional)
Mold Making:
- Mold-making Material (silicone, alginate)
- Mixing Bowls & Spatulas
- Clamps
- Release Spray (optional)
Finishing Touches:
- Sandpaper
- Paint & Brushes
- Clear Coat (optional)
Safety:
- Gloves
- Eye Protection
Design and Sculpting a Vinyl Toy
Finally, follow these steps to approach the design and sculpting process with pure imagination:
1. Brainstorming and Mind Mapping:
Firstly, Utilize your inner world instead of visual references. Let’s brainstorm:
- Theme: Would you like a whimsical critter, a futuristic warrior, or a reimagined household item?
- Personality: Put playful, mischievous, or wise words in your toy’s description.
- Movement and Form: Think about how your toy stands, sits, or interacts.
It’s great to use mind maps. Write down ideas, draw doodles, and connect them.
2. Inspiration from Within:
Feels, memories, and experiences can inspire you. Consider:
- Favorite books, movies, or music: Who’s your favorite character?
- Dreams and nightmares: Do you have any?
- Personal experiences: Is it possible to put emotions or memories into words?
Sketch out your initial ideas based on your inner world. Your sketches don’t have to be perfect; just capture the essence.
3. Sculpting from Imagination:
Once you’ve got your ideas flowing, pick a medium:
- Clay: Flexible, easy to adjust, perfect for organic shapes.
- Foam: Forgiving and lightweight, allowing for quick iterations.
- Wood: Natural, angular aesthetic, great for rustic or angular designs.
- Air Dry Clay/Paper Mache: You can explore different forms without committing to anything permanent.
Robocasting later requires hollow models. Starting with your mind map and sketches, add details. Let your intuition guide you and try different approaches.
4. Embrace Imperfections:
There’s something beautiful about creating without a photo. You should embrace imperfections in your creations. It’s fun to have lines that aren’t straight, unexpected textures, and quirky details.
5. Feedback and Refinement:
Get feedback from trusted friends or online communities. Their feedback can help you refine your design. Keep in mind that feedback is a tool, not a judgment.
6. Let Your Creation Guide You:
Your initial idea might change as you sculpt. Let your creation lead the way and follow your intuition. Sculpting sometimes leads to the most magical vinyl toys.
Mold-making process for Vinyl toys
Let’s take a look at the mold-making process for vinyl toys:
Preparing your Sculpture:
- Cleanliness is key: Don’t let dust, fingerprints, or debris get on your sculpted toys. If there are any imperfections, they’ll show up in the final cast, so smooth them out.
- Hollow it out: Rotocasting requires hollow sculptures. You can carve or drill out a cavity in a solid object without compromising the overall shape.
Building the Mold Box:
- Size matters: Make a sturdy box a little bigger than the sculpture. Be sure to leave enough room for the mold material to surround your toy. Keep the box tightly sealed to prevent leaks.
- Dividing channels (optional): For intricate designs or undercuts, use straws or skewers to create channels. Mold material flows into all crevices and gets separated easily thanks to the channels.
Mixing and Applying the Mold Material:
- Material choice: You can go with silicone (flexible, detailed, durable) or alginate (cheap, beginner-friendly, less durable). Mix according to the manufacturer’s instructions.
- Pouring with precision: Cover your sculpture with the liquid mold material without trapping air bubbles. Gently nudge bubbles toward the edges with a brush or scraper.
Curing and Separation:
- Patience is a virtue: Let the mold material cure according to its instructions. Alginate usually sets faster than silicone.
- The big reveal: Once the mold is cured, carefully pry it open. Remove your sculpture gently, being extra careful not to damage the mold.
Mold Maintenance and Tips:
- Release agent: Spray a thin layer of mold release spray on your sculpture before pouring.
- Reinforcement (optional): After the silicone mold has cured, add a layer of fiberglass or resin to add durability.
- Store with care: Keep it away from direct sunlight and dust. If it’s stored right, it can be used again and again.
Rotocasting – Transforming Your Design into Vinyl Reality
Rotocasting transforms your sculpted work of art into the adorable, squishy vinyl toy you envision! This is an exciting process, but safety and precision are key factors. Keeping safety in mind, let’s explore the exciting world of vinyl toy roto casting:
Preparation is Key:
- Mold Check: Clean, dry, and check for any imperfections in the mold. You can replicate any debris in your final toy.
- Ventilation is Vital: Rotocasting involves heat and liquid vinyl, so choose a well-ventilated workplace.
Mixing and Pouring:
- Material Matters: There are different grades and viscosities of vinyl. For safe handling and mixing, follow the manufacturer’s instructions.
- Precision Pouring: Make sure vinyl reaches all crevices of the mold without overflowing. Protect your eyes and gloves from splashes.
Roto Revolution:
- Secure Rotation: Make sure the sealed mold is securely fastened to the rotocasting machine’s rotating arm.
- Heat and Speed: As the mold spins, vinyl is evenly distributed and a hollow cavity is created. Follow the machine’s operating instructions to set the temperature safely.
Cooling and Release:
- Patience Pays Off: Let the vinyl cool completely in the mold. Both the mold and the toy can get damaged if you rush it.
- The Grand Reveal: Carefully separate the mold halves once it’s cooled! Ensure that your new toy is clean and free of vinyl remnants.
Beyond the Basics:
- Pigments and Coloring: Before pouring, add pigments to the vinyl. For safe handling of pigments, check the manufacturer’s instructions.
- Multi-Part Casting: Multi-part designs need multiple molds and casting iterations. Find out how to do seamless assembly with rotocasting.
Safety First:
- Handle vinyl and operate the rotocasting machine with gloves and eye protection.
- Both the vinyl material and the rotocasting equipment have safety instructions.
- Be aware of potential heat hazards and work in a well-ventilated area.
Polishing Your Gem-Finishing Touches for Your Vinyl Toy
It’s done! You sculpted, molded, and cast your vinyl toy dream! This is the moment to turn your blank canvas into something truly captivating and unique. We’re going to explore the exciting world of vinyl toy finishing touches!
1. Sanding for Smoothness:
If your toy is fresh from the cast, it may have some minor imperfections. For a smooth, even surface, buff them away with fine-grit sandpaper (around 220 grit). When you sand, be careful of delicate details and curves.
2. Filling and Patching (Optional):
Small nicks and gaps can be filled with a two-part epoxy or vinyl-compatible patching compound. Before you sand the filler smoothly, let it dry completely.
3. Priming for Paint Perfection:
Prime your walls before applying color. As a result, the paint adheres better and doesn’t streak or bleed. You can use acrylic plaster or a vinyl primer designed for vinyl.
4. Painting Your Masterpiece:
Your creativity shines here! For intricate details, acrylics, spray paint, or airbrush can be used. Layers, gradients, and textures make your character pop. Make sure each layer dries completely before adding another.
5. Varnishing for Lasting Beauty:
You should varnish your paint job to protect it and make it more vibrant. You should use a vinyl toy varnish that’s water-based or acrylic. Your creation will look fresh and won’t fade or scuff.
6. Decals and Details:
Want to make it more personal? Make it sparkle with vinyl decals, stickers, or glitter. If you want to draw fine details, you can use markers or pens.
7. Accessories and Assembly (Optional):
Assemble any removable parts or accessories if your design has them. For detachable parts, use glue or magnets to attach them.
8. Packaging and Presentation:
Don’t let your masterpiece go bare! Make a custom display stand or box to display your vinyl toys. It gives the whole thing a professional touch.
FAQs About How to Make a Vinyl Toy
Can I make vinyl toys without 3D modeling skills?
It’s helpful, but not mandatory. A 3D modeler can also help.
Do I need to sketch my design before moving on to digital modeling?
You can visualize ideas with sketches, but it’s not necessary. The tools of the digital age are directly used by some creators.
Which software is commonly used for designing vinyl toys?
Most 3D modeling software includes Rhino, Blender, and Brush.
Which vinyl types are most common in toys?
Flexible and easy to mold, soft vinyl (PVC) is commonly used.
How can I avoid common casting issues?
Mix properly, pour evenly, and deal with air bubbles during casting.
Conclusion
Finally, Vinyl toys are as diverse as your imagination, and every step of the process lets you put your unique stamp on them. Embrace the vibrant world of vinyl toy crafting, explore, and let your creativity flow. Creating vinyl toys is a journey of creativity, learning, and satisfaction. The article demonstrates everything about the process of how to make a Vinyl toy, and don’t be afraid to experiment! Maybe your little vinyl creation will become the next big designer toy.